Local Development
Setup your local development environment
Editor setup
IntelliJ IDEA with Cursive
Open the project in IntelliJ IDEA with the Cursive plugin. It will automatically detect the project structure and dependencies and configure the REPL run configuration. We need to slightly update it with additional aliases for dev and test:
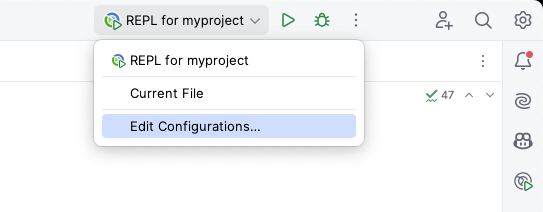
- At the top right corner, open
REPL for myproject->Edit Configurations...
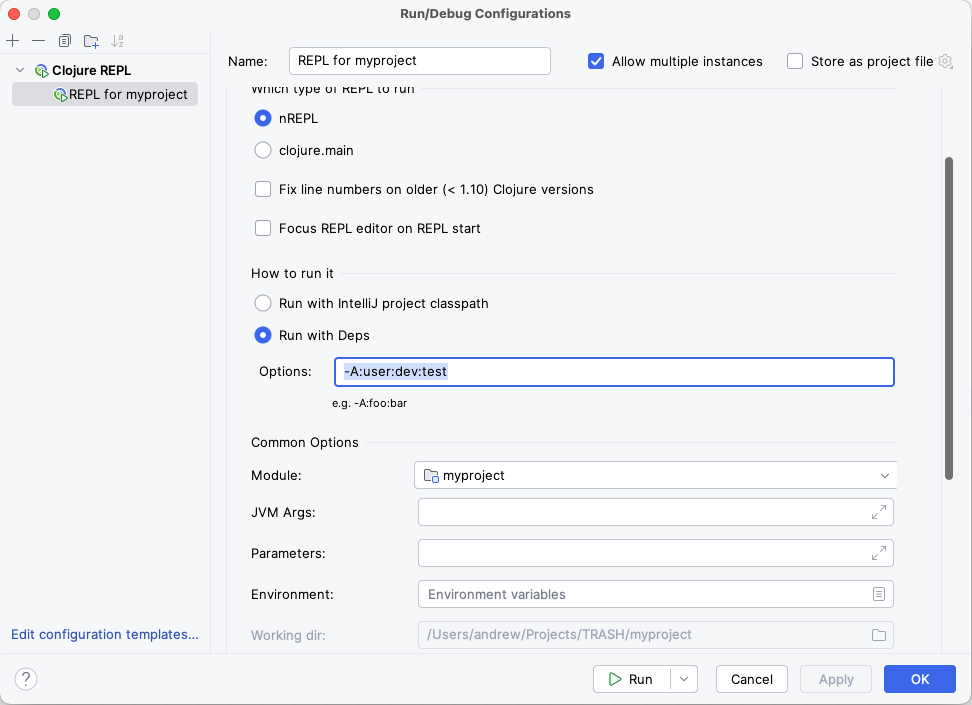
- Add options
-A:user:dev:testand pressOK:
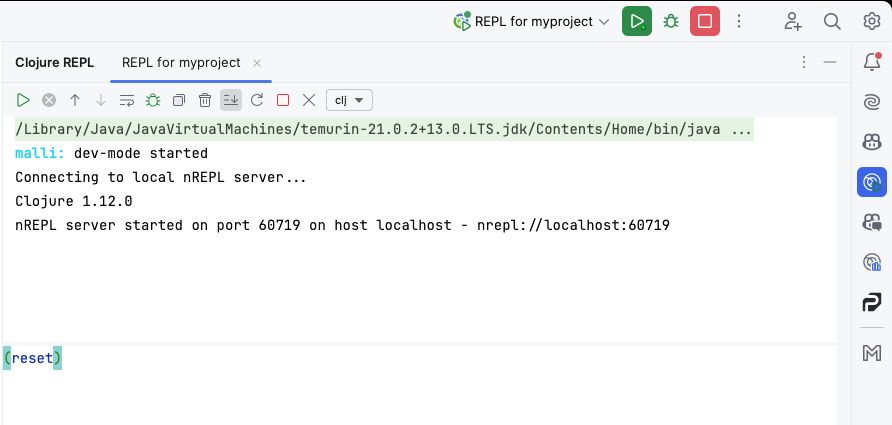
- Now you can run the REPL, execute
(reset)in it, and start coding.
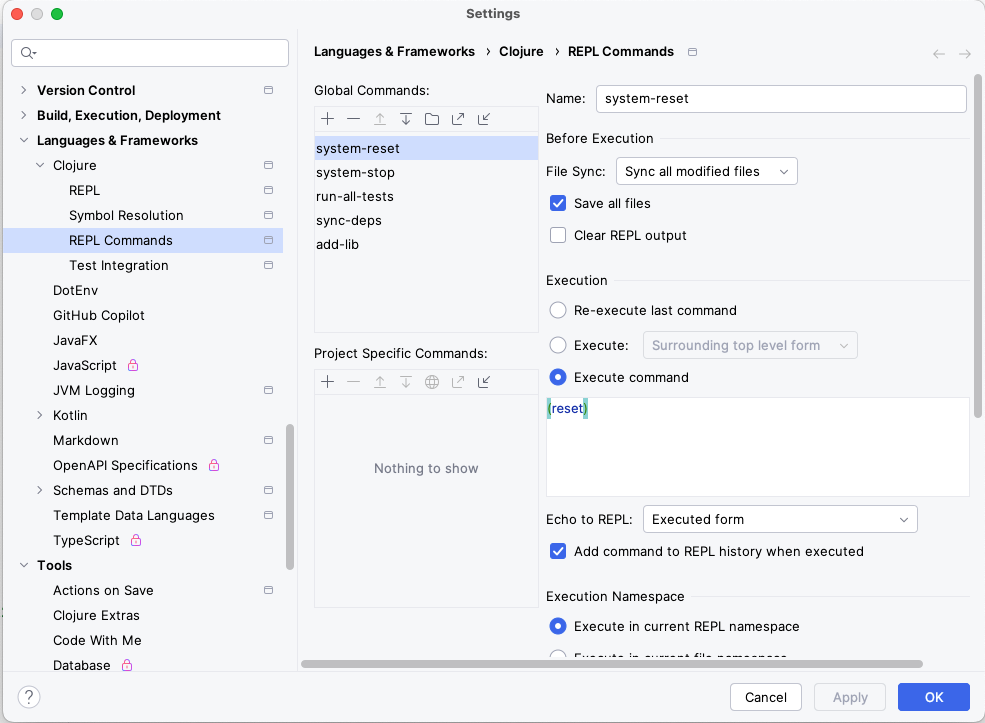
Tip
It is convenient to configure the REPL command and bind it to a keyboard shortcut so you can quickly run (reset) with a keypress.
VSCode with Calva
Open the project in VSCode with the Calva extension. It will automatically detect the project structure.
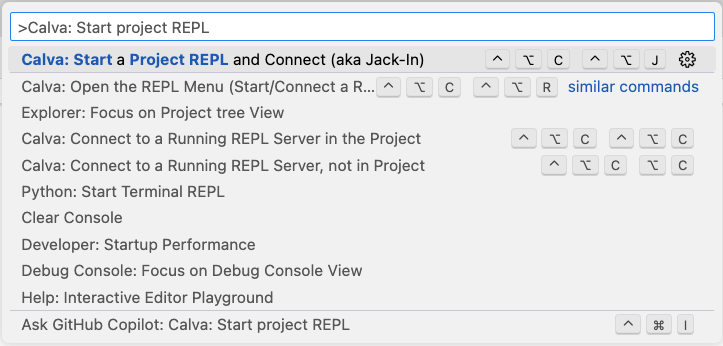
- Start the REPL by running "Calva: Start a Project REPL and Connect (aka Jack-In)":
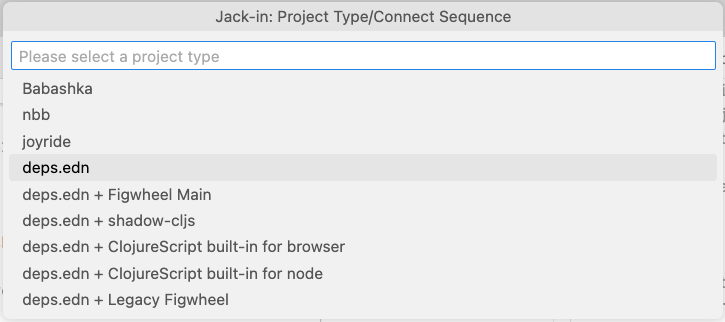
- Select
deps.ednconfiguration in the popup:
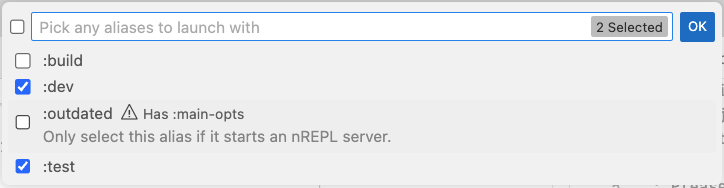
- Select
devandtestaliases in the next popup:
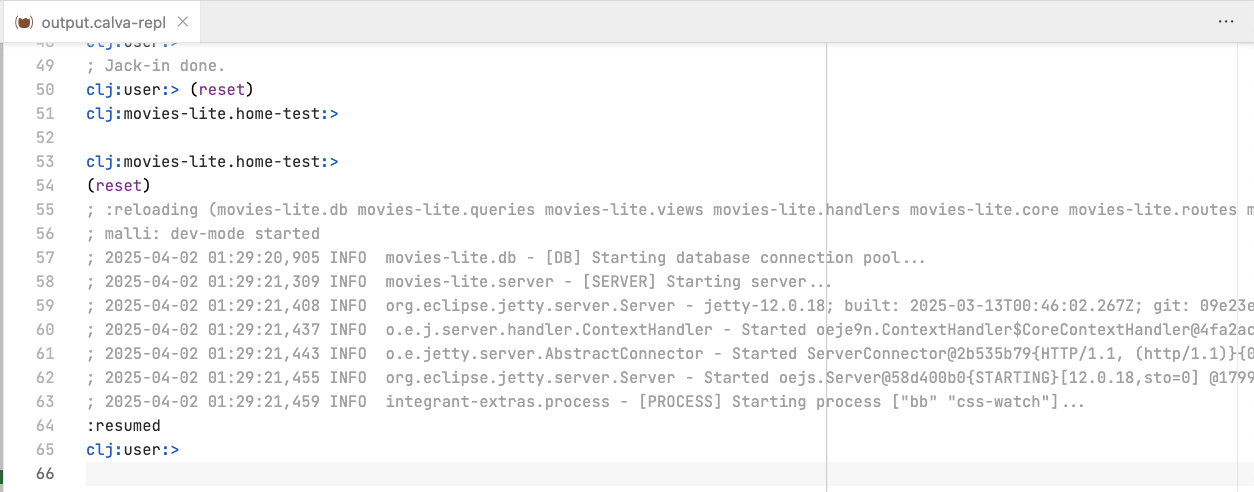
Now you have the REPL running and can execute (reset) to start the application. To do this, navigate to the dev/user.clj file:

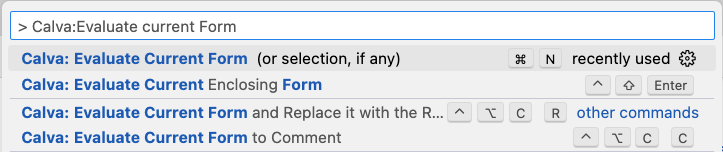
and run the command "Calva: Evaluate Current Form":
The system will start in the REPL:
REPL
The REPL is the main entry point for development. You can run it from the terminal or from your IDE as shown in the previous section.
We have preconfigured some convenient commands for you in the dev/user.clj file in the (comment ...) section at the bottom.
Let's look at them:
(reset)- starts the application and automatically reloads it on code changes.(stop)- stops the application.(run-all-tests)- runs all tests in the project.(repl-deps/sync-deps)- fetches new dependencies fromdeps.ednand loads them into the REPL.
mise
This project template uses mise-en-place to manage system dependencies. It's a convenient tool for managing isolated environments for different projects.
All system dependency versions are specified in the .mise.toml file. Install them by running:
This will install all required system dependencies for the project. The first time, you might also need to run mise trust.
Tip
.mise.toml file for specific versions.Manage project
We use Babashka Tasks for managing the project. View the list of available tasks by executing bb tasks in the terminal:
To lint, format code, check all dependency versions, and run tests, use the bb check command, or run other commands individually.
There are two commands to manage CSS files: css-watch and css-build. You don't need to run them manually because the watch-command is already included in the system start in the resources/config.dev.edn file, and the build-command is used in the Dockerfile for production builds.
The project includes a minimal build tool for static files called fetch-assets that downloads files from URLs and places them in the resources/public directory. This helps vendor all static files in the project.
To configure which files to download, edit the bb.edn file in the fetch-assets task definition:
Pre-commit git hooks
Running code quality checks before committing or pushing code is convenient. The project intentionally doesn't include this by default as everyone has their own preferences. However, you can easily add it using the excellent tool Lefthook:
- Install Lefthook by adding it to the
.mise.tomlfile and runningmise install:
- Create a
.lefthook.ymlfile in the root of the project with the following content:
- Activate Lefthook by running:
Before your next commit, Lefthook will run the bb fmt-check and bb lint commands if any Clojure or EDN files have been changed.
Tip
pre-commit to pre-push, or add bb test and bb outdate commands to the config.