Kamal
Deploy your Clojure application with Kamal
We use Kamal for deployment. It's a CLI tool that simplifies deployment with Docker on your own server.
Install Kamal locally
Add ruby = "3.3.0" to your project's .mise.toml or to the global ~/.mise.toml file.
Install Ruby and Kamal:
Deploy from local machine using Kamal
At the root directory of your project, please create a .env file with appropriate variables for your project:
SERVER_IPis the IP address of your server.REGISTRY_USERNAMEis your GitHub username, that we will use to push the Docker image to the GitHub registry.REGISTRY_PASSWORDis your personal access token withwrite:packagesandread:packagesscopes. You can create it in your GitHub account settings.APP_DOMAINis your application domain name. It will be used to generate the SSL certificate for your application and make routing at reverse proxy.SESSION_SECRET_KEYcan be any random string. It will be used to sign the session cookies.
If you are using PostgreSQL you should also add:
DATABASE_URL- the URL to connect to your PostgreSQL database, used for application. The database host must follow the pattern:<project-name>-db.POSTGRES_DB,POSTGRES_USER,POSTGRES_PASSWORD- the database name, user and password for Kamal to create the database accessory.
Important
.env must not be included to the system control version of your repository.SSH access to the server from CI
SSH_PRIVATE_KEY - an SSH private key without password that you should create and add the public part of it to the server's ~/.ssh/authorized_keys to authorize from the CI worker.
To generate SSH keys, run:
As a result you will be able to deploy from GitHub Actions.
Create GitHub Token
To create a personal access token, go to your GitHub account settings, navigate to "Developer settings" > "Personal access tokens" > "Tokens (classic)" and click on "Generate new token". Make sure to select the write:packages and read:packages scopes.
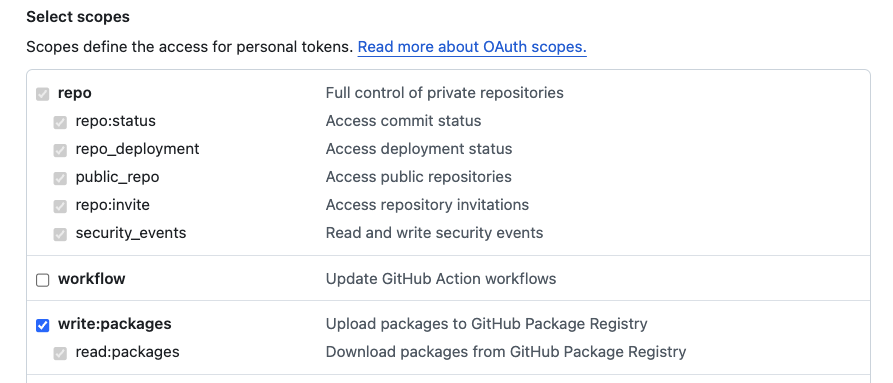
This token you will put to REGISTRY_USERNAME env var only locally. In CI we will be using secrets.GITHUB_TOKEN which is automatically created by GitHub Actions for each workflow run.
First deploy to a fresh server
Important
Before first deployment, please:
- update repository url in
LABELof your Dockerfile - create your repository on GitHub (it can be empty)
This is important for correct attribution of the image and ability to push image to GitHub registry from GitHub Actions using built-in GitHub Access Token from secrets.GITHUB_TOKEN in the CI workflow file.
This first run will take some time to install Docker and other dependencies on the server. If everything ok you should see the similar output at the end:
And the application should be available at your application domain you set in APP_DOMAIN env var.
If you already have a server with Kamal installed, you can skip this step.
Info
.kamal/deploy.yml to keep Kamal files in single place.GitHub Packages Registry
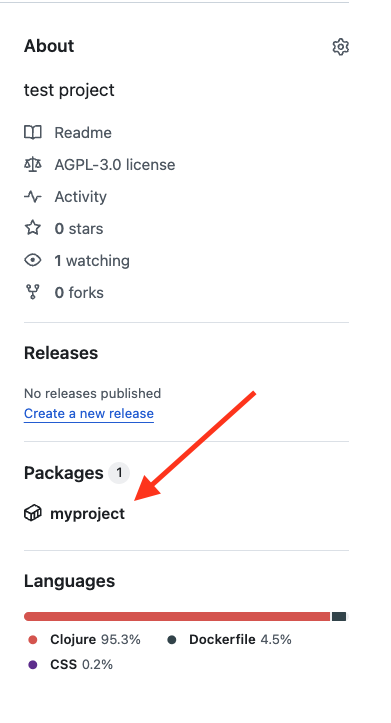
If LABEL in Dockerfile was set up correctly, after first deployment you will see your image in the GitHub Packages on the repository page:
Regular deployment
Deploy from GitHub Actions
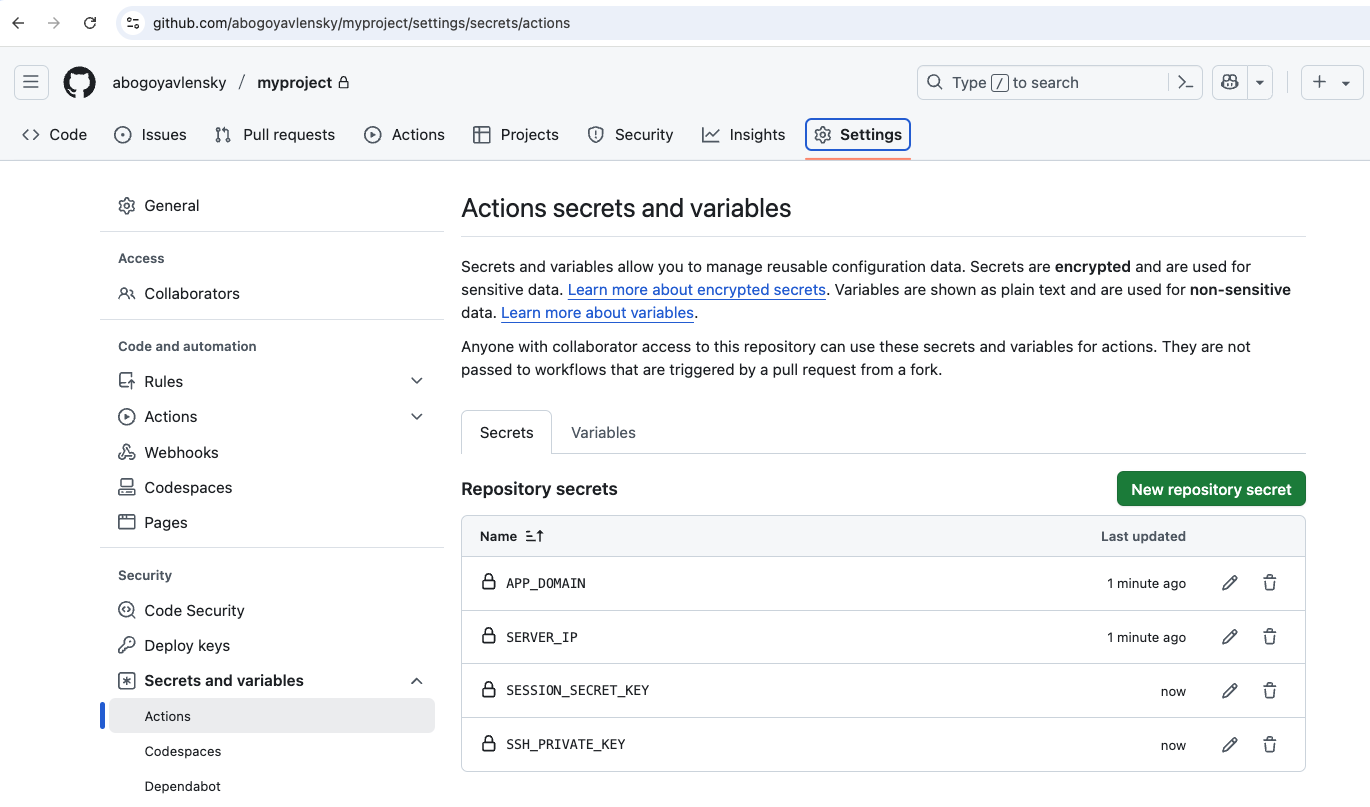
Setup secrets for Actions at your repository settings Settings > Secrets and variables > Actions > New repository secret:
If you are using PostgreSQL, you should also add:
Tip
.env and GitHub Secrets for convenience and simplicity in the tutorial.
The recommended approach is to fetch secrets from systems that are designed to store sensitive data.
Read more at Kamal documentation.Then you can just push to master branch, or merge PR to master and GitHub Actions will automatically deploy your application to the server.
Full cycle of regular deployment from GitHub Actions should take between 2 and 3 minutes.